


Use Chores to manage recurring work and Progress to review activity. Open Household → Settings to protect or back up your household. Use Today to complete daily work.
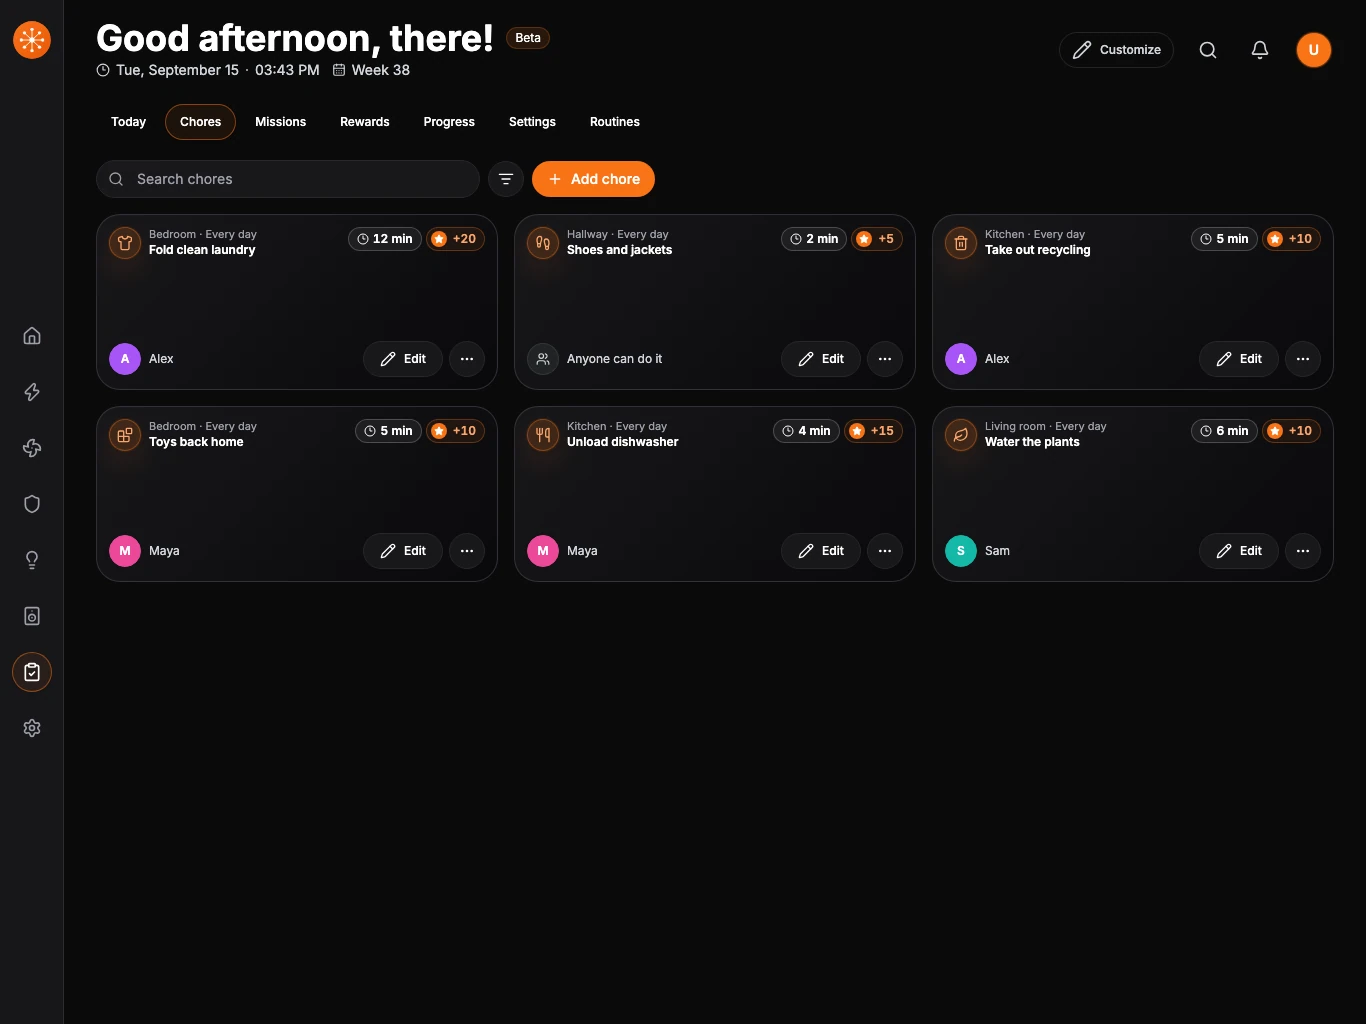
Edit, pause, or archive a chore
- Open Household → Chores.
- Search by name or filter by room, person, schedule, or status.
- Choose Edit on the chore card.
- Use the sidebar steps The chore, Who does it, and When it repeats to update the work, assignment, and schedule. On a small screen, the steps appear across the top. Choose Next and Back, or select a step directly; your edits stay in place as you move between them. The More options section below each step’s main fields holds instructions, points, approval, missed-work behavior, or reminders. The card colour can be changed in the chore preview.
- On When it repeats, choose Save changes.
Each chore has a consistent automatic colour unless someone overrides it. Overdue red and completed green take priority over the custom colour.
On Who does it, choose a standby for a person’s chore or choose Fewest assigned or completed chores for rotation. More options can set a later due date for each person, open claiming shortly before the scheduled start, wait for an earlier claim’s approval, and keep a claim when work is sent back. On When it repeats, choose Hourly interval for an elapsed-hour repeat or After completion to keep the chosen clock time a set number of days after finished work.
Open the card’s More actions menu, then choose Pause to stop creating new occurrences while keeping the chore and its history. Choose Archive when the definition should leave the active library; archived chores can be restored later. Deleting a chore stops future reminders but preserves completed history.
Plan a person’s time away
- Open Household → Settings → People and choose Edit for the person.
- Turn on Paused and optionally choose Resume on. Chores assigned to a standby can still be done while the primary person is away.
- If the person has a return date, choose Review due dates in People. Select unfinished work from the absence and choose First new due date. Navet previews the number of selected chores and moves them one per day after the return.
Paused work does not create overdue reminders. Existing claims remain available for manager review. Long-cycle chores appear in the review list but are not preselected.
Review progress
- Open Progress.
- Choose the last 7 or 30 days.
- Filter to one person when you need their activity only.
- Review completed and missed work, the upcoming week, and the workload note.
- Export CSV or JSON when you need a copy of the filtered history.
Choose Weekly report in Progress to review the current week. Select Markdown or HTML, then copy the report to share it. The report includes completed and missed work, pending approvals, and the next week’s schedule.
In the Home Assistant panel, navet.weekly_report returns the same kind of report to an
automation. For scheduled delivery, set a weekly time trigger, call navet.weekly_report with
format: markdown and a response_variable, then pass that variable’s content to your
notification action. The calendar entity Navet chores lists upcoming due work for calendar
automations. Home Assistant also provides typed navet.reward_decision and
navet.adjust_points actions for Home Assistant administrators and system automations.
Give point adjustments a stable command_id so a retried
automation cannot apply the same change twice.
Each chore’s notification settings can select which claim, completion, approval, and missed-work events send alerts. Today shows current alerts with the actions available to their recipient. On Home Assistant mobile notifications, the action buttons apply to the exact chore revision that produced the alert; an older button has no effect after the chore changes.
To set a badge or personal achievement, choose Add badge or Add achievement in Progress. Choose what to measure and a target number. Select chores when the goal should count only those chores, choose whether it runs once, every week, or every month, and optionally add award points. A personal achievement also needs a person. The cards show each person’s current progress and earned awards. A missed due day breaks a due-day streak; days with no scheduled work, including a pause, leave it unchanged.
Manage missions and rewards
In Household → Settings → Motivation style, choose Light points, Family goals, or Child-friendly adventure to show the Missions and Rewards tabs. Open either tab to create and edit supporting goals. After you create at least one mission or enabled reward goal, See rewards appears in Chores today. Choose it to reveal the current mission and reward cards for that visit. Choosing Off hides these surfaces and preserves their saved goals and household history.
To use a reward, open Rewards, choose the person under Request reward for, and select Request reward on a goal. The person needs enough points for its cost. The request holds the reward’s current name and cost, while their point balance stays available until review.
A household manager reviews requests in Rewards. Approve spends the points once; Decline leaves the balance alone. After approval, Mark fulfilled records that the reward was delivered. Refund points returns the approved cost if the reward cannot be given. The request status and point decisions stay in the household record even if the goal is edited.
Hide household chores
Chores are enabled by default. To hide the feature, open Settings → Dashboard, find Household chores, and choose Off. Navet removes the Household chores workspace, Home and room chore pills. Your chore definitions and history stay saved, so choosing On later restores the feature with its existing data.
Protect management changes
Open Settings and configure a management PIN when a shared wall screen should allow completion but not planning changes. The PIN protects people, definitions, motivation, retention, restore, and reset actions. It is a household-screen boundary, not an account password, and it is not included in chores backups. To replace it later, open Household → Settings → Management PIN, choose Change PIN, and confirm the new 4–8 digit PIN. Navet asks for the current PIN first whenever management is locked.
Restore a backup during first setup
You can restore a Navet chores backup from the welcome screen of a new installation.
- Open Household.
- On the welcome screen, choose Import backup.
- Select the saved Navet chores JSON file.
- Review the confirmation and choose Import backup.
Navet validates the backup before replacing the empty workspace. The backup must contain an active household manager. A completed backup opens the restored household directly; an incomplete backup returns to the appropriate setup state.
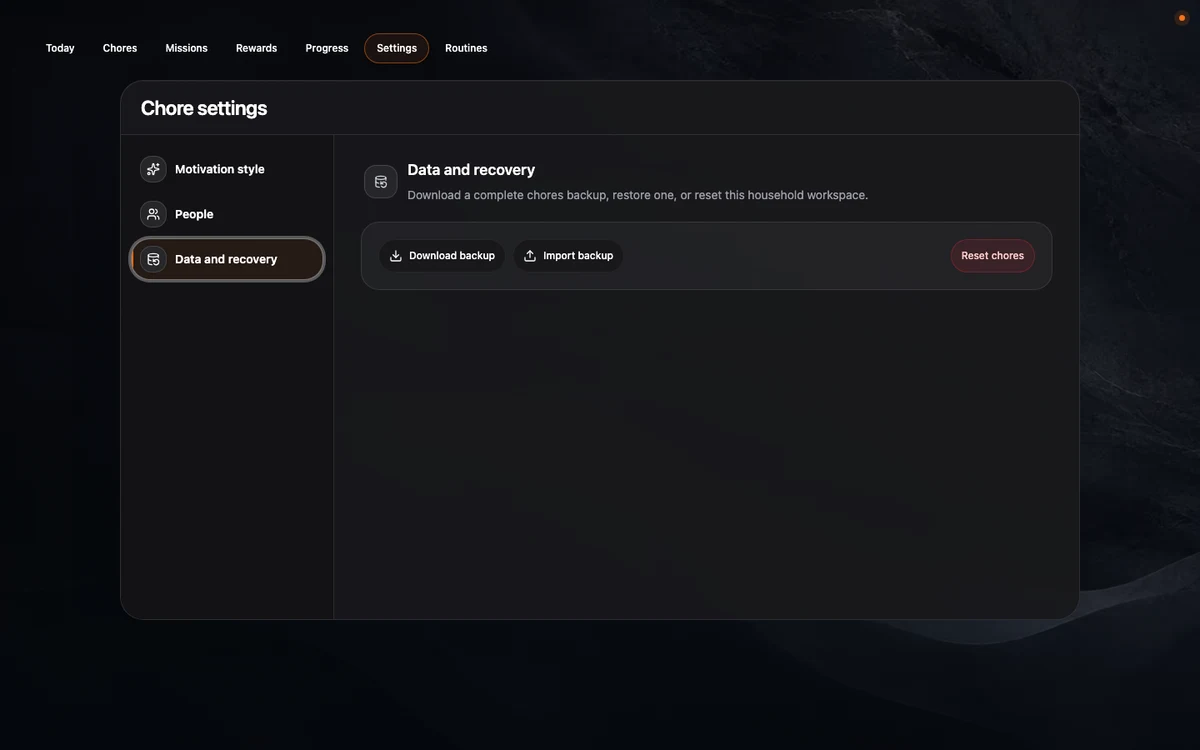
Download a backup
- Open Household → Settings.
- Choose Data and recovery.
- Choose Download backup.
- Store the downloaded
navet.choresfile somewhere protected.
Restore a backup
- In Data and recovery, choose Import backup.
- Select a Navet chores backup, a supported Home Assistant todo export, or a normalized ChoreOps export.
- Review the restore confirmation.
- Choose Merge to keep current chores and remap conflicts, or Replace to remove the current workspace first.
Download a fresh backup before using Replace if the current household may be needed later. If restoring fails, the confirmation keeps your selected backup and shows an error. Choose Merge or Replace again to retry, or Cancel to discard the selection. Restore controls are disabled while saving.
Recover damaged chore data
If Navet cannot read the current workspace, it leaves the saved file unchanged and shows Chores need attention.
- Choose Try again after checking that the installation storage is writable.
- Choose Repair chores when a healthy last-known-good copy is available.
- Use Start over only when neither copy can be recovered and the existing data is no longer needed.
Starting over requires explicit confirmation and preserves the damaged primary file for diagnosis before an empty workspace is created.